Paymaster Setup
To sponsor gas fees with SmartAccount, configure the paymaster using the appropriate method for your network.
Ethereum, Kaia, Base
Use ABC Paymaster. Simply enable it from the WaaS Admin dashboard to complete setup.
1. Go to Project Settings
Log in to ABC WaaS Admin and navigate to Project - Settings.
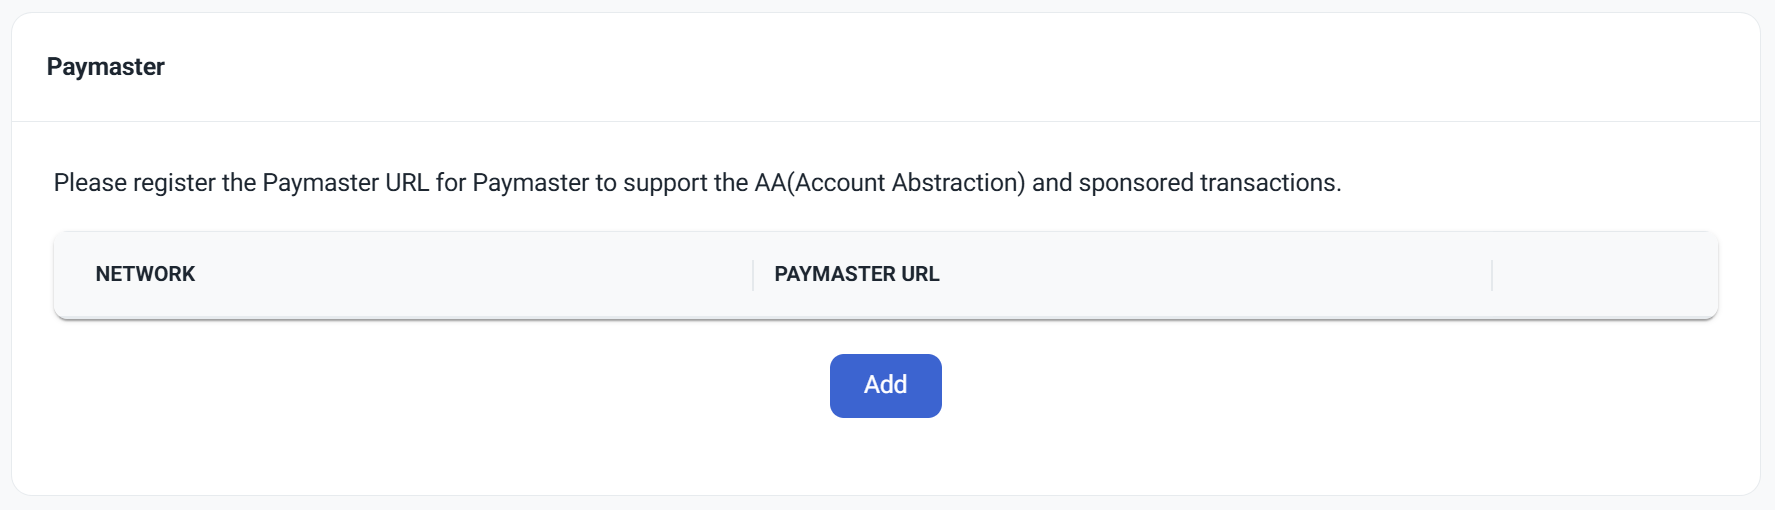
2. Add Paymaster
Scroll to the "Paymaster" section at the bottom of the settings page and click the "Add" button.
3. Select a Network
Select the network you want to enable fee sponsorship for and click "Add".
The network must be added to your project before the sponsorship service can be enabled.
Avalanche C-Chain
Integrate a Paymaster using Biconomy. Other services can also be integrated using the same approach.
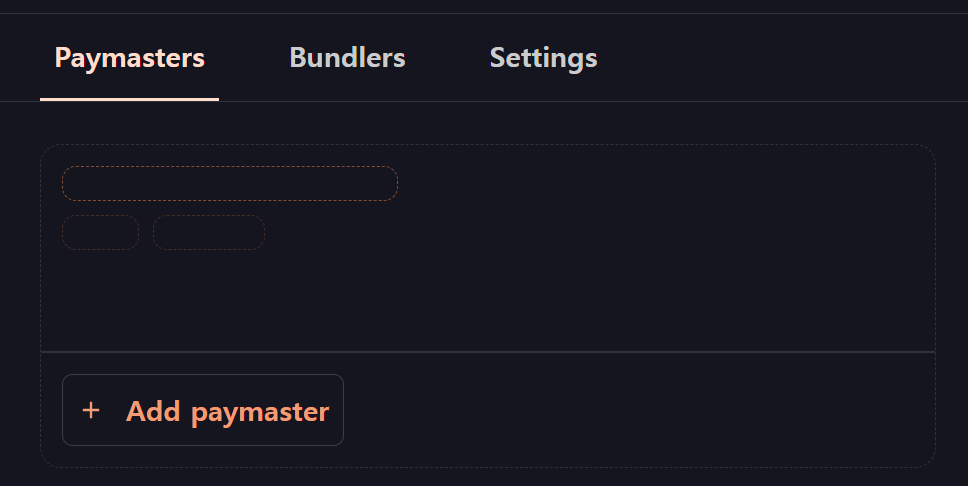
1. Add Paymaster
Once you log in to the Biconomy dashboard, you'll be directed to the paymaster page. To add a paymaster, click the "Add Paymaster" button.
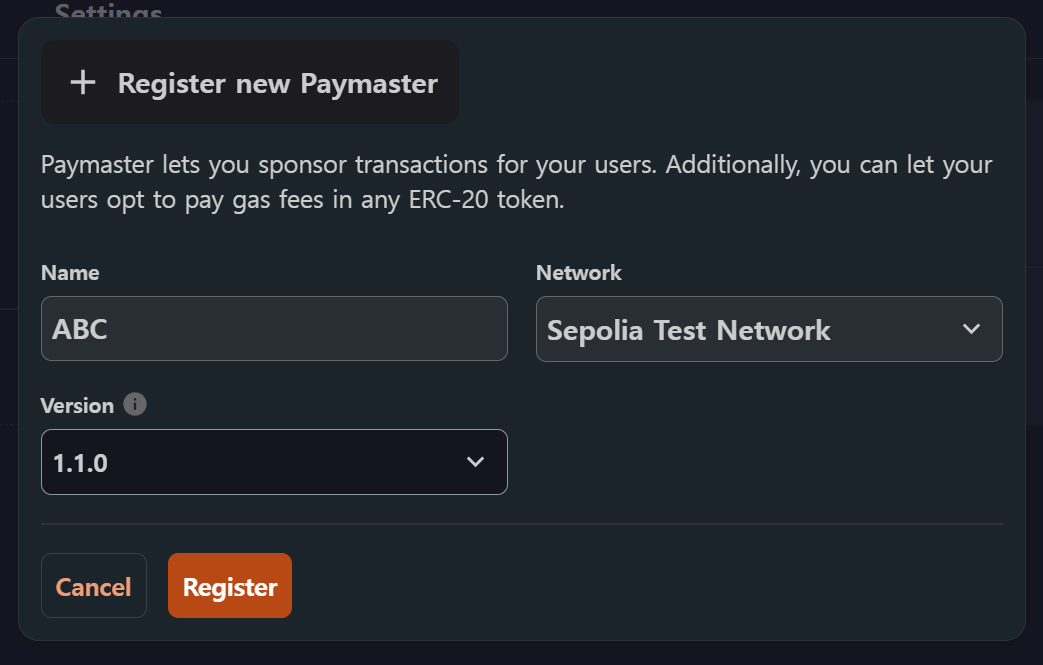
2. Register Paymaster
After clicking the "Add Paymaster" button, you can register the paymaster. Assign a name, select your preferred network, and choose version 1.1.0 (compatible with EntryPoint v0.6) if a version option is available.
3. Create Gas Tank
If you want to sponsor users' transactions to make them gasless, you'll need to set up a gas tank.
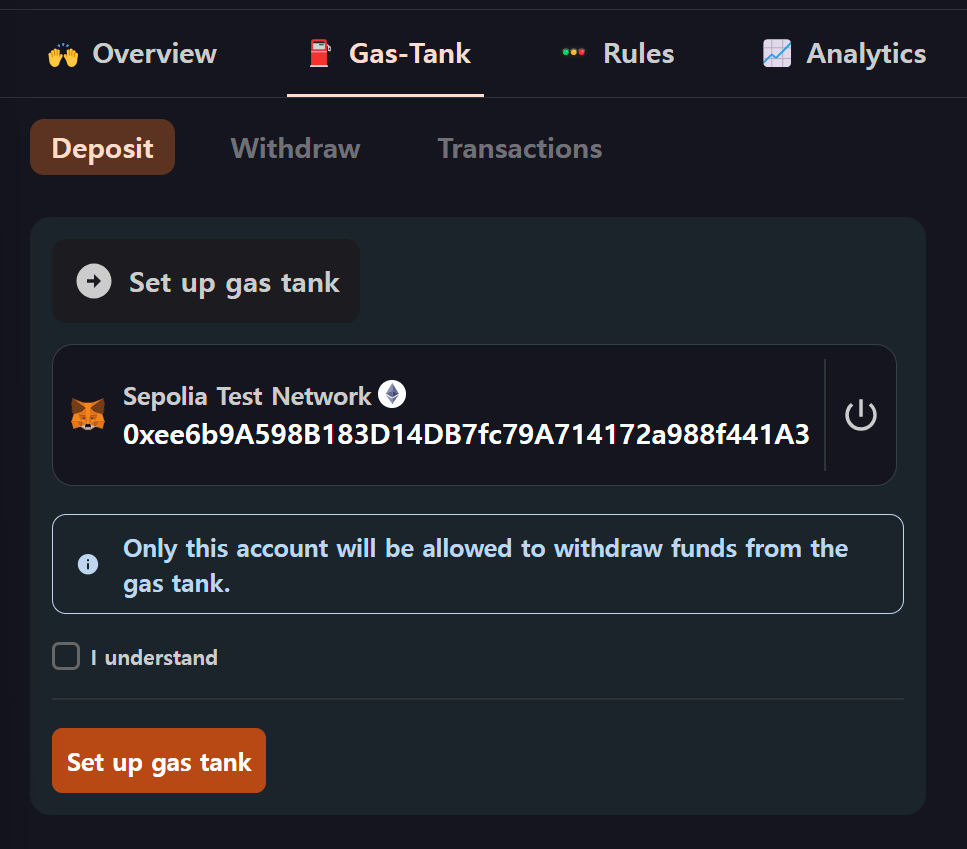
On the Gas Tank page, note the wallet you use for the initial setup. This wallet is the only one authorized to withdraw funds from the gas tank. When you click "I understand" and "set up gas tank", your wallet will prompt you for a signature. This action incurs some gas costs.
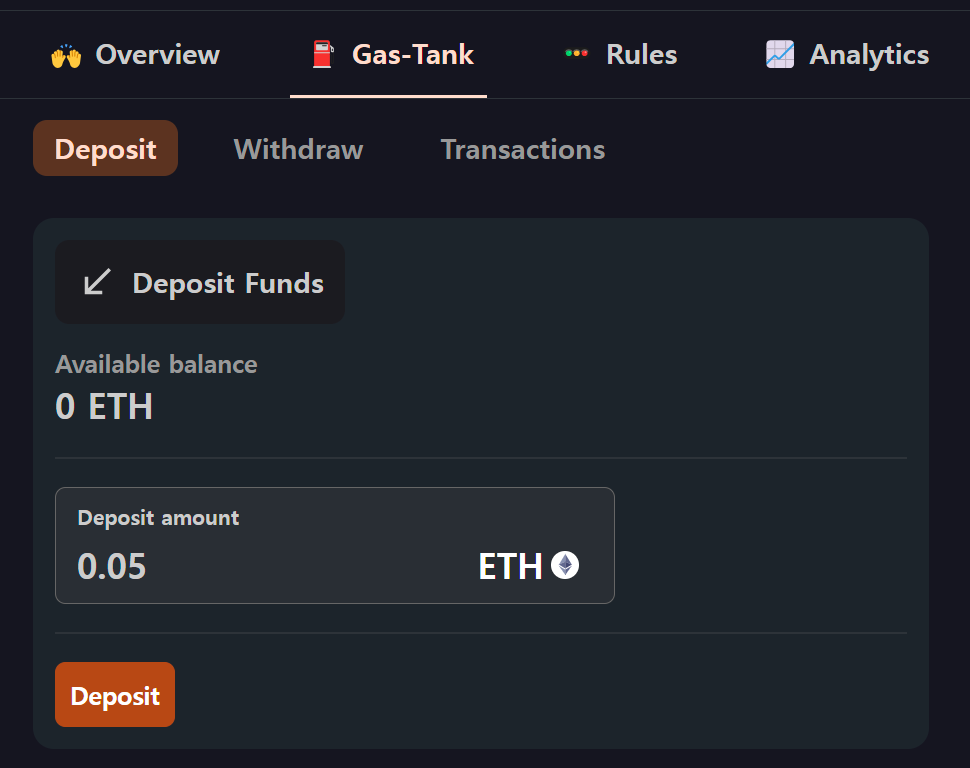
4. Deposit Funds
Now that your gas tank is set up, you can deposit funds into it. Choose an amount and click "Deposit" to fill up your tank. Once the transaction is confirmed, you'll be able to see the available funds in your gas tank.
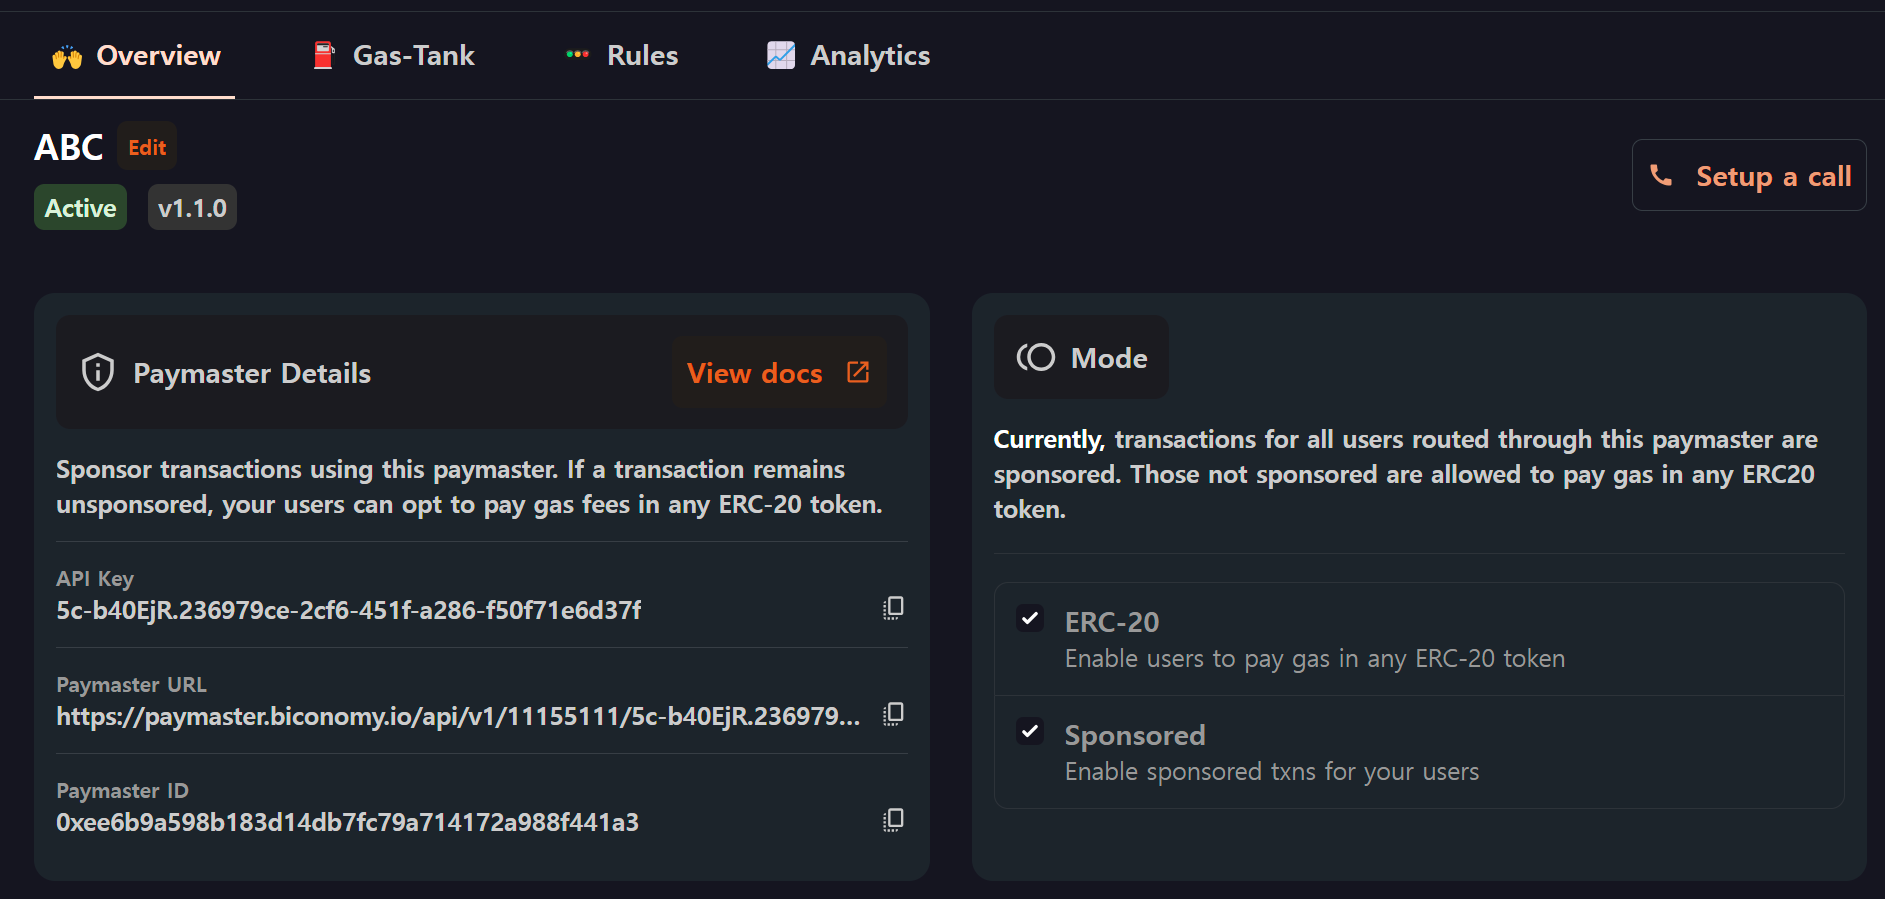
5. Copy Paymaster URL
Once you've made the deposit, navigate to the Biconomy Overview page and copy the Paymaster URL.
6. Add Paymaster URL
In the ABC WaaS Admin, go to Project - Settings, scroll to the "Paymaster" section, and click the "Add" button.
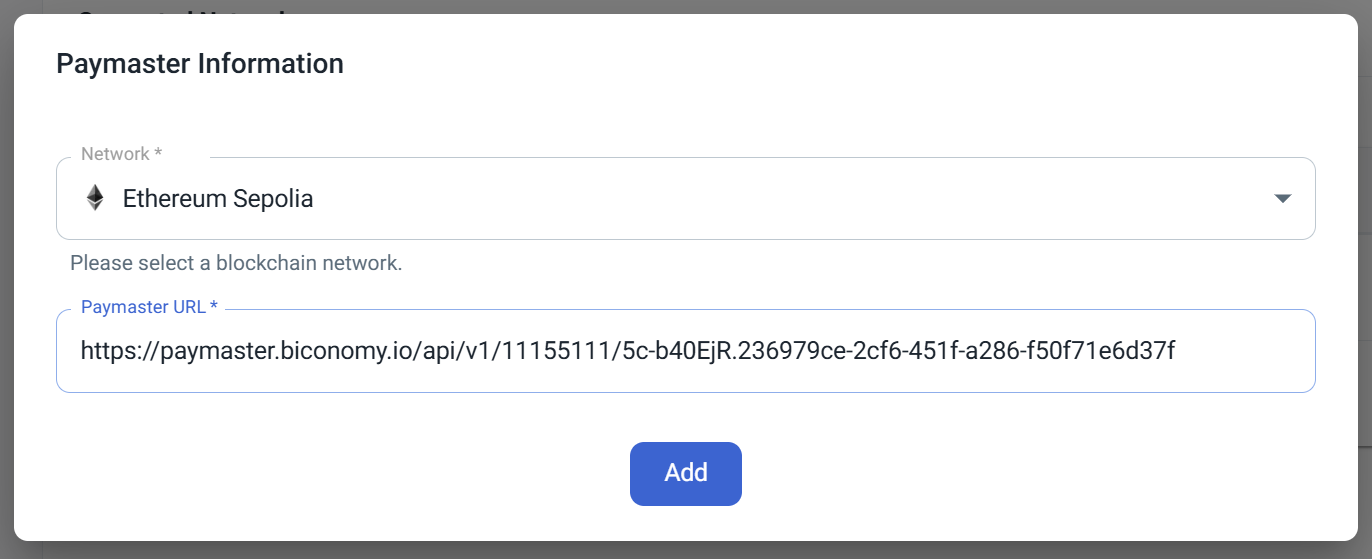
7. Enter Paymaster Information
Select the Avalanche C-Chain network, enter the Paymaster URL copied from Biconomy, and click "Add".